Showing posts with label 3D AUTOCAD TUTORIALS. Show all posts
Showing posts with label 3D AUTOCAD TUTORIALS. Show all posts
Sunday, 27 November 2011


3D AUTOCAD TUTORIAL - 14
Autocad 3D Tutorial - Tires
 |
| Autocad 3D Tutorial - Tires |
Type : Windows Media Video file (WMV)
Duration : 18:56 Minutes
Bit Rate : 466 Kbps
Dimension : 800 x 600
Size : 22.03 MB
Music : Yes
Available for : All Version of Autocad
Author : Mufasu
Information
3D Autocad Tutorial - Tires discusses how to create a 3D object by using the commands easily understandable. So this tutorial can be used for all versions of autocad.
The first time you will make a two-dimensional pattern by using the circle command and pline. Next followed by forming the pattern into three dimensions. There will be a lot of commands that will simplify the use of this command.
Autocad Command Used
ScreenShot
 |
| Autocad 3D Tutorial - Tires |
Download
Autocad 3D Tutorial - Tires
Autocad 3D Tutorial - Tires
3D AUTOCAD TUTORIAL - 13
AutoCAD Tutorial: ShuttleCock
Video AutoCAD Tutorial 3D Shuttlecock
Steps
By using the command line, circle and trim shape of an object as shown below.
Steps
By using the command line, circle and trim shape of an object as shown below.
 |
| AutoCAD Tutorial Shuttlecock |
Once the object is created, then change the object into polyline by using the pedit command. To change it into a 3D object able to use the Revolve command.
 |
| AutoCAD Tutorial Shuttlecock |
Now we have formed the head of the shuttlecock, the next is to make the feather on the shuttlecock. The trick is almost the same as making the head of the shuttlecock, the first form of a rod and then by using the command line shape of a feather.
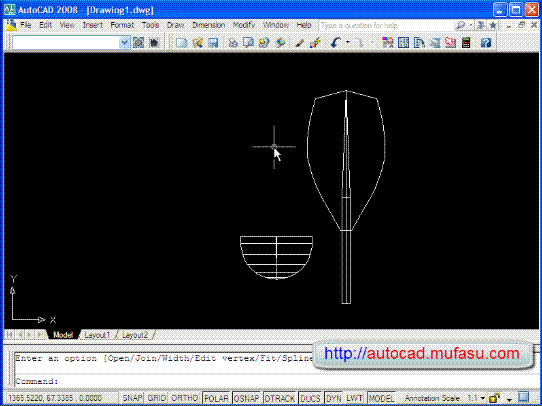 |
| AutoCAD Tutorial Shuttlecock |
Combine the two objects into one by using the move command. Previously, tilt the bristles at 15-20 degrees.
 |
| AutoCAD Tutorial Shuttlecock |
After that, using duplicate array command suttlecock feathers on the head in a circle.
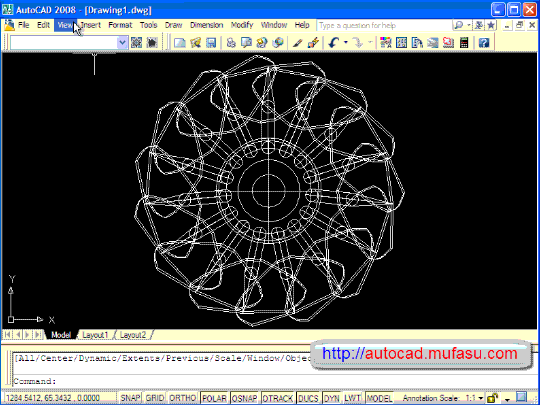 |
| AutoCAD Tutorial Shuttlecock |
Setelah objek sudah jadi, lalu ubah objek tersebut menjadi objek polyline dengan menggunakan perintah pedit. Untuk merubah menjadi bentuk 3D dapat menggunakan perintah revolve. To create a binder, can use the command line and Revolve, will be created as shown below.
 |
| AutoCAD Tutorial Shuttlecock |

3D AUTOCAD TUTORIAL - 10
3D I Beam 100x50
This time I will give some idea I Beam forming 3D objects by using AutoCAD 2012.
 |
| 3D I Beam 100x50 |
 |
| 3D I Beam 100x50 |
Furthermore, by using the fillet command, form each corner as shown below.
 |
| 3D I Beam 100x50 |
To transform 2D objects into 3D shapes can use the Extrude command, but the object must be in the form Polyline (if at the beginning of your drawing using the line command, then to form the object into a polyline, use the pedit command).
3D AUTOCAD TUTORIAL - 9
3D Helix Stairs
THIS IS FOR DOWNLOADING ......
Video AutoCAD Tutorial 3D Helix Stairs
About AutoCAD Tutorial 3D Helix Stairs
Steps to start is as follows:
About AutoCAD Tutorial 3D Helix Stairs
Before you make a Helix Stairs 3D objects, you need to specify the width, height and number ofsteps that are intended. As an example I give a wide diameter of 15 stairs with a height of 26 and the number of steps as much as 13 pieces.
 |
| AutoCAD Tutorial 3D Helix Stairs |
Steps to start is as follows:
- In the top view, the shape of a circle with a diameter of 15, and a transverse line from the center of the circle to the side of the circle.
 |
| AutoCAD Tutorial 3D Helix Stairs |
- Use the array to form a line that wrapped around the whole circle.
 |
| AutoCAD Tutorial 3D Helix Stairs |
- After that, using the trim command, cut all the circles and objects such as reserving a piece ofpizza. : D Use the command pedit to form a polyline object.
 |
| AutoCAD Tutorial 3D Helix Stairs |
- Use the array command again to form an object to circular objects.
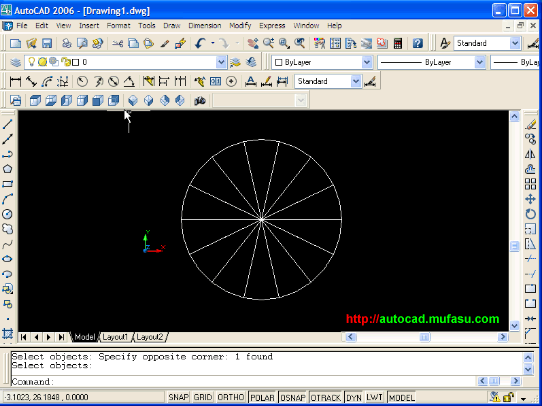 |
| AutoCAD Tutorial 3D Helix Stairs |
- In the front view and use the command 3dorbit, try to view a 3D look. and reserving one object (the others move vertically by 2). Once all the objects to form vertically, you can create a circle on the bottom of the object triangle.
 |
| AutoCAD Tutorial 3D Helix Stairs |
- Use extrude commands to form a 3D object into a form.
3D AUTOCAD TUTORIAL - 8
Tutorials AutoCAD : Create Simple Flash Disk
THIS VIDEO IS 4 DOWNLOADING ......

3D AUTOCAD TUTORIAL - 7
Video Autocad 3D Tutorial - Chair
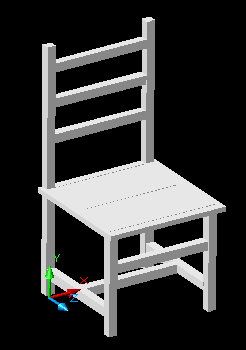 |
| Autocad 3D Tutorial - Chair |
Video : WMA
Duration : 0:19:20
Bit Rate : 618 Kbps
Dimensions : 800 x 600
Size : 32Mb
Music : Yes
Used For : All Versions Autocad
Author : Mufasu
About Autocad - 3D Chair Tutorials:
Autocad - 3D Chair can be used for any version of AutoCAD by using the command - the command is very simple. With the presentation of the dedicated for beginners and intermediate who wants to learn to create three-dimensional objects.
Inside Autocad - 3D Chair you will get a lot of knowledge about the use of command - AutoCAD commands such as Line, Region, Copy, Pan, Views, and others and you learn how to mapping materials to an object.
Inside Autocad - 3D Chair you will get a lot of knowledge about the use of command - AutoCAD commands such as Line, Region, Copy, Pan, Views, and others and you learn how to mapping materials to an object.
Screenshot:
 |
| Autocad 3D Tutorial - Chair |
Video
3D AUTOCAD TUTORIAL - 6
Autocad 3D Tutorial - Catapult
 |
| Autocad 3D Tutorial - Catapult |
Title : Autocad 3D Tutorial - Catapult
Type : WMA (HQ)
Duration : 41:54 Minutes
Bit Rate : 799 Kbps
Dimensions : 800 x 600 (HQ)
Size : 54 Mb
Music : yes
Available for All Autocad Version.
Author : Mufasu
Information:
Screenshot:

Video:
Type : WMA (HQ)
Duration : 41:54 Minutes
Bit Rate : 799 Kbps
Dimensions : 800 x 600 (HQ)
Size : 54 Mb
Music : yes
Available for All Autocad Version.
Author : Mufasu
Information:
Autocad 3D Tutorial-Catapult is a tutorial that is easy to learnfor those users who want to learn Autocad three dimensions. This tutorial can be used from various versions of AutoCAD, so it is your convenience. That can be learned in this tutorial: implementing the system view, and fewuse the system UCS. Hopefully, you can boost the power of imagination to imagine each side ofthe object.
For Autocad:
Autocad 2000, Autocad 2002, Autocad 2004, Autocad 2005, Autocad 2006, Autocad 2007, Autocad 2008, Autocad 2009, Autocad 2010, Autocad 2011 and Autocad 2012.
For Autocad:
Autocad 2000, Autocad 2002, Autocad 2004, Autocad 2005, Autocad 2006, Autocad 2007, Autocad 2008, Autocad 2009, Autocad 2010, Autocad 2011 and Autocad 2012.
Command Used:
Circle, Line, Copy, Zoom, Pan, Pedit, Region, Fillet, Extrude, Trim, Move, Undo, Redo, Rotate, Pline.
Screenshot:

Video:
Subscribe to:
Posts (Atom)